When winter arrives in our kitchen, the wooden crates from southern orchards bring an intoxicating perfume of cold citrus. Seville oranges, Meyer lemons, bergamots, and thick-skinned cedri fill the counters with mottled yellows and deep ambers. While the juice yields bright acid for dressings and marinades, the true wealth of these fruits resides within the outer millimeter of peel. The flavedo holds dense clusters of oil glands containing volatile terpenes, aldehydes, and esters that quickly vanish if left to dry on their own or exposed to fierce heat.
We preserve these skins by burying them in coarse, unrefined sea salt. Unlike alcohol extracts that pull harsh notes alongside the aromatic oils, or sugar syrups that alter the bright balance, salt acts gently. It draws out just enough liquid from the cell walls to dissolve its own mineral crystals, creating a heavy brine that suspends and locks in the essential oils without cooking them. Over several weeks in a dark cabinet, the peels lose their raw bitterness and take on a mellow, rounded fragrance that anchors our cooking all through the year.
Harvesting Wax-Free Fruit for Long Infusions
The success of this salt cure depends entirely on the raw rind. Commercial citrus sold in supermarket bins is usually washed with detergents after harvest and coated with food-grade shellac, carnauba wax, or synthetic resins to arrest moisture loss and produce a glossy finish. These waxes trap dirt beneath them, prevent salt from penetrating the tissue, and dissolve slowly into stews, lending a cloudy, bitter residue. For salt preservation, we look for untreated, tree-ripened fruit from organic orchards or trusted backyard trees.
If you must work with standard market fruit, wash each piece individually before taking a knife to it. Submerge the fruit in a bowl of warm water held at 45 degrees Celsius for two minutes to soften the wax. Then, using a stiff natural-bristle brush, scrub the skin with firm, circular strokes using a mild paste made of equal parts baking soda and water. Rinse the fruit under cold running water until the skin feels slightly tacky rather than slick. Pat every fruit dry with clean linen towels. Any standing water left on the surface will dilute your salt cure later.
Different citrus varieties yield distinct aromatic profiles and physical textures under salt:
- Seville (Bitter) Orange: High concentration of neroli and bitter principles. The skin is sturdy, thick, and pebbled, holding its structure remarkably well over twelve months of storage.
- Meyer Lemon: A thin, tender skin with floral, herbal undertones. Because it carries very little bitter albedo, it softens quickly in brine and integrates smoothly into sauces.
- Bergamot: Extremely aromatic, packed with linalyl acetate. We use it sparingly because its perfume easily dominates other ingredients in a dish.
- Pomelo or Grapefruit: Thick skins that require deep trimming, but reward the effort with bright, bittersweet notes that pair cleanly with oily fish and game meat.
Trimming Bitter Inner Pith with a Paring Knife
Citrus skin consists of two distinct layers: the outer flavedo, which contains the vibrant pigment and oil sacs, and the inner albedo, the spongy white pith. While a small cushion of pith helps the rind absorb brine without turning mushy, an excess of albedo will leach limonin and other bitter compounds into your salt, muddying the clean citrus character. Our goal is to shave away the sponge while leaving the oil cells intact.
We begin by cutting a small coin off the stem end and blossom end of the fruit so it sits flat and steady on a wooden end-grain cutting board. Using a very sharp, stiff paring knife with a 3-inch or 4-inch blade, score the fruit from pole to pole, cutting just through the skin into four or six vertical segments. Slip the tip of your thumb or the flat of the knife blade beneath the rind at the top cut, gently teasing the skin away from the fleshy segments beneath.
Place each strip of peel skin-side down on the board. Lay the blade of your paring knife flat against the white pith, holding the knife parallel to the wood. With your off-hand securing the trailing edge of the peel, slide the blade forward in a gentle sawing motion, angling the cutting edge slightly upward away from the colored skin. You want to remove about two-thirds of the white spongy matter. When trimmed correctly, the strip should feel supple, with small pinpricks of light visible through the rind when held up to a window.
Once trimmed, slice the rinds into uniform ribbons roughly 4 millimeters wide and 40 millimeters long. Uniformity ensures that the salt draws moisture at an even rate across the entire batch, preventing thin fragments from desiccating while thicker pieces remain under-salted.
Layering Coarse Sea Salt and Rind Ribbons
The type of salt chosen directly determines the flavor, color, and preservation of the peel. We avoid standard table salt, which contains iodine and anti-caking agents that produce a metallic tang and turn the curing brine murky. Instead, we use unrefined sea salts with distinct crystal structures.
| Salt Variety | Crystal Structure | Moisture Content | Curing Characteristics |
|---|---|---|---|
| French Grey Salt (Guerande) | Medium, irregular moist crystals | 7 to 9 percent | High trace mineral content; forms a rich, clay-tinted brine slowly; ideal for sturdy peels. |
| Coarse Sicilian Sea Salt | Large, hard square grains | 2 to 4 percent | Clean, sharp salinity; draws liquid quickly without dissolving immediately; leaves rind crisp. |
| Coarse Kosher Flake (Pure Salt) | Flat, pressed hollow flakes | Less than 1 percent | Dissolves rapidly; creates an immediate wet brine; best for very thin skins like lime or Meyer lemon. |
We work with a standard ratio of one part salt to four parts trimmed peel by weight. For a standard 500-milliliter glass jar, this typically means weighing out 320 grams of sliced peels and 80 grams of coarse sea salt. Using a scale avoids the unpredictable volumetric density of different salt crystals.
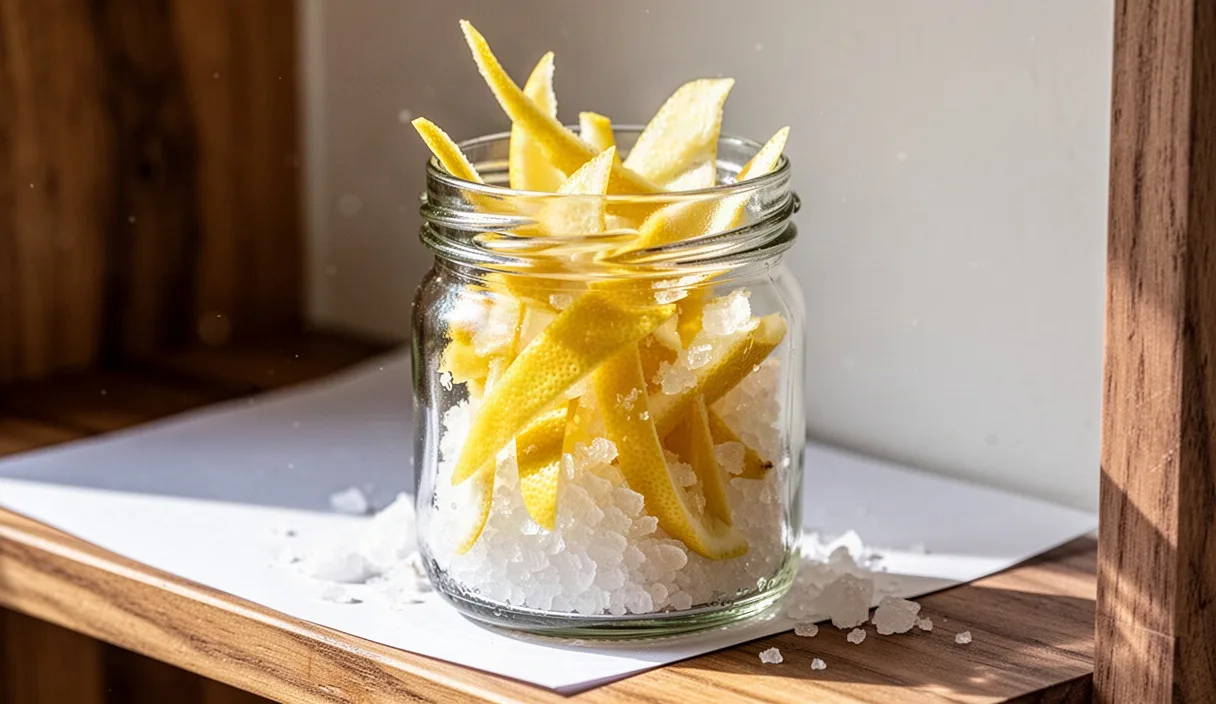
To pack the vessel, scatter a thick base layer of salt across the bottom of a clean glass jar. Add a single layer of citrus ribbons, spreading them out so they do not cling in tight clumps. Cover them completely with another measure of salt. Continue this alternating pattern, pressing down gently with your knuckles or a wooden cocktail muddler after every two additions. Finish the jar with a generous blanket of salt so that no peel touches open air at the top.
Weighting the Jar to Accelerate Brine Formation
Salt cannot preserve what it does not touch. In an unweighted jar, the ribbons curl, creating air pockets where wild molds can establish themselves before the salt can draw out moisture. Applying mechanical pressure collapses these air pockets and forces the salt crystals against the plant cells, speeding the transfer of intracellular water out into the jar.
We place a round glass fermentation weight or a clean, non-porous ceramic disc directly atop the uppermost salt layer. The weight should cover most of the surface area without wedging tightly against the jar walls. If you do not have a glass weight, a small food-safe bag filled with concentrated brine (20 grams of salt dissolved in 200 milliliters of water) works well; if the bag leaks, it adds salt water rather than plain water, keeping the preserve safe.
Seal the jar with a standard two-piece lid or a bail-top rubber gasket. Store the vessel in a cool, dark larder held between 15 and 18 degrees Celsius. Direct sunlight must be avoided, as ultraviolet light degrades both the delicate peel pigments and the terpene molecules responsible for the fruit perfume.
Within 48 hours, you will see a clear, viscous brine gathering at the base of the jar. By day five, this liquid should rise high enough to submerge the peels entirely. Leave the weighted jar undisturbed for 21 days. During this period, the harsh raw notes will soften, the ribbons will turn slightly translucent, and the brine will become saturated with yellow and orange citrus oils.
Drying Salted Rinds for Pepper Grinders
While the wet ribbons can be pulled straight from the brine for cooking, drying a portion of the cured peel creates a shelf-stable seasoning component that grinds cleanly into spice blends.
Fish the ribbons out of the brine with a clean wooden fork. Do not rinse them; that thin coating of cured salt crystals protects the rinds during the drying process. Spread the ribbons across a parchment-lined dehydrator tray or a wire baking rack set inside a sheet pan, making sure no two pieces touch. Air circulation across all sides prevents mold formation during the early hours of drying.
We dry the peels using one of two methods:
- Electric Dehydrator: Set the machine to 40 degrees Celsius. Keep the temperature low to prevent volatilizing the fragrant oils. Dry for 10 to 14 hours until the ribbons snap cleanly in half when bent.
- Convection Oven: Set your oven to its lowest warm setting, ideally between 45 and 50 degrees Celsius, propping the door open slightly with the handle of a wooden spoon to let humidity escape. Check the rinds after 6 hours; they should be brittle, not leathery.
Let the dried rinds cool to room temperature on the counter for 30 minutes, then check their texture. If they feel soft or flexible, return them to the heat; residual water inside a pepper mill will cause the mechanism to rust and the ground spice to clump. Once bone-dry, snap the ribbons into small 5-millimeter squares.
For a reliable pantry grinder blend, combine 30 grams of dried salted citrus rinds with 60 grams of black Tellicherry peppercorns, 10 grams of green peppercorns, and 5 grams of cracked coriander seed. Load this into a ceramic-burr grinder. Metal burrs can pit over time when exposed to dry salt crystals, making ceramic the superior mechanism for long-term use.
Incorporating Salted Zest into Stews and Pan Sauces
Salt-cured citrus peel carries a flavor profile completely distinct from fresh zest. The curing process strips away raw acidity and green bitterness, leaving a savory, concentrated citrus flavor that melds into savory fats without curdling dairy or competing with wine reductions.
Because the peels have absorbed significant salt, you must adjust the seasoning of your primary dish. When pulling wet ribbons directly from the jar, we lightly wipe off the surface salt with a damp towel, then mince the peel into a fine dice. One tablespoon of minced salted peel typically replaces a half-teaspoon of pure salt in an average recipe.
We rely on this preserved zest across several traditional kitchen preparations:
- Long Braises: Stir a tablespoon of minced salted Seville orange peel into a pot of braised pork shoulder or beef short ribs during the final 45 minutes of cooking. The peel melts into the connective tissue and cooking wine, leaving behind a warm, fragrant undertone.
- Pan Sauces for Pan-Seared Fish: After searing trout or sea bass, deglaze the skillet with dry white wine or vermouth. Whisk in cold unsalted butter along with a teaspoon of finely minced Meyer lemon peel ribbons. The residual salt in the peel seasons the sauce while the citrus oils cut the rich butter.
- Herb Pastes and Gremolatas: Finely chop together flat-leaf parsley, a small clove of garlic, and two salted lemon peels. Use this over roasted root vegetables, osso buco, or grilled lamb chops.
- Finishing Compound Butter: Beat 15 grams of finely minced cured peel into 200 grams of soft, unsalted cultured butter. Roll the butter into a log using parchment paper and chill. Slice coins over hot seared steaks or charred bitter greens like radicchio.
Common Mistakes to Avoid
Working with salt-cured fruit is straightforward, but subtle errors in technique can spoil a batch or yield a harsh result.
- Leaving excessive white albedo: If you do not scrape the rind down until light passes through, the cure will pull concentrated bitter glycosides into your brine, giving every dish an astringent, chalky taste.
- Using pre-ground or table salt: Table salt carries chemical anti-caking agents that settle as a white silt in the bottom of your crock, and its fine grain packs so tightly that it often draws moisture unevenly, resulting in dry top layers and soggy bottom ribbons.
- Allowing peels to float above the brine: Any peel exposed to the head space of the jar is vulnerable to ambient fungal spores. Keep your weights in place throughout the curing window.
- Rinsing the rinds under tap water: Washing the cured peels washes away the aromatic brine that coats their surface. If you need to lower the salinity, dice the peel and soak it in a small bowl of dry wine or stock for five minutes before cooking.
- Drying at high temperatures: Exceeding 55 degrees Celsius during the dehydration process bakes the citrus oils rather than drying them. The rinds will turn brown, lose their floral character, and smell like burnt marmalade.
Taking the First Steps in the Larder
To begin building this reserve, start with a modest batch of three or four untreated fruits while winter citrus is at its peak. Procure a clean, wide-mouth 500-milliliter glass canning jar, a glass fermentation weight, and a small sack of grey coarse sea salt. Wash and trim your fruit carefully, pack your layers firmly, and set the jar into a dark, cool cupboard where you can observe the brine rise over the first week.
Once the initial 21-day cure has elapsed, keep the jar stored in a cool larder or in the refrigerator, where it will remain stable for up to twelve months. Reserve half of your ribbons to dry for your pepper mill, and keep the rest submerged in their aromatic brine, ready to be lifted out, diced, and melted into evening sauces throughout the spring and summer ahead.