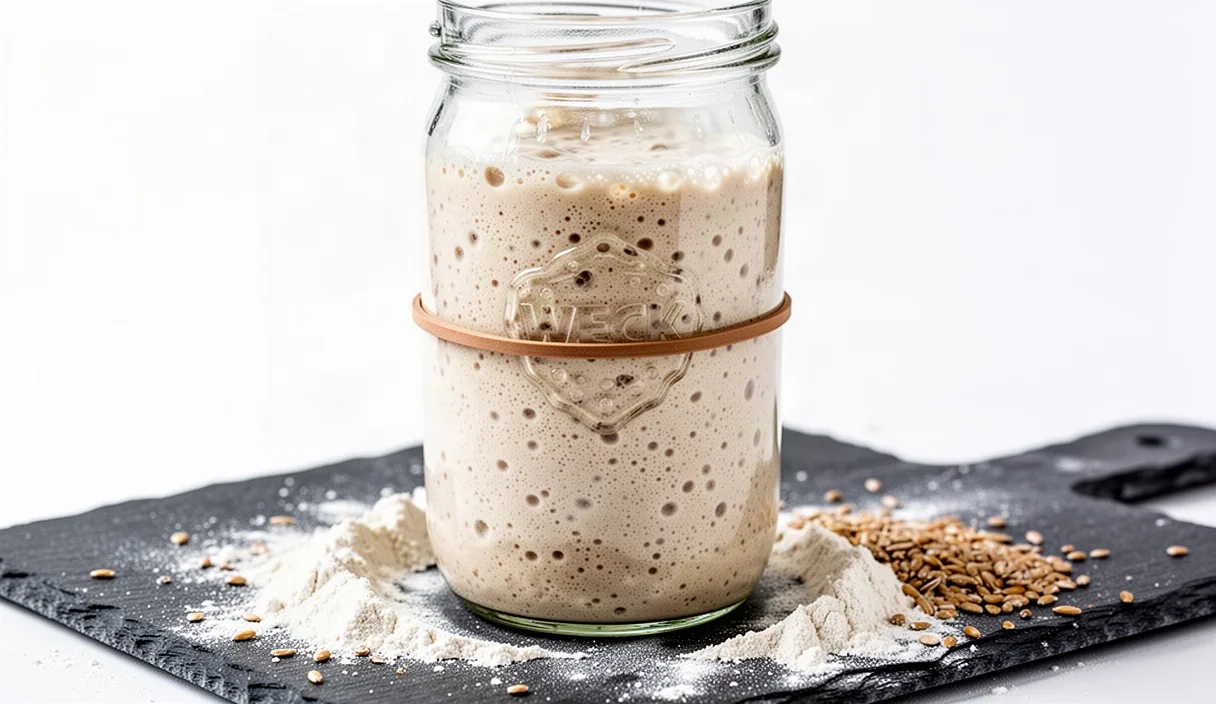
When a sourdough culture slows down, we notice it first in the jar before we ever shape a loaf. The wet mass sits motionless on the counter, dull and flat, smelling more like nail polish remover or sharp vinegar than ripe fruit and warm milk. A healthy jar should crackle faintly when we hold it to our ear, full of tiny gas channels pulling away from the glass. When those bubbles shrink into pinpricks and the surface turns watery and grey, the yeast community has dwindled under an excess of acid and neglect.
We do not need to discard the culture and begin again from scratch. The wild yeasts and lactic acid bacteria are durable organisms, evolved to survive long spells of cold storage and lean feeding in grain bins and crocks. Reviving them requires tactile attention, clean water, freshly milled grain, and a calculated shift in how we handle the daily refresh. By adjusting hydration, clearing out accumulated acid, and minding the temperature of our water, we can bring the fermentation back into a steady, reliable rhythm.
Reading the Signs of Ferment Exhaustion
Before we measure out flour and water, we inspect the physical state of the jar. Ferment exhaustion presents clear structural symptoms. When a culture is hungry for too long, enzymatic activity breaks down the gluten matrix built by previous feedings. The paste liquefies, losing the elastic web that holds carbon dioxide. If we tilt the jar, exhausted starter runs like thin pancake batter rather than stretching like soft taffy.
Scent gives us direct insight into the microbial balance. In an active starter, lactic acid bacteria produce a gentle, yogurt-like aroma while wild yeasts produce sweet ethanol. In an exhausted starter, acetic acid dominates, producing a sharp, stinging vapor that hits the back of the throat. If the neglect has run for weeks in a cold refrigerator, we may find a layer of hooch, a dark, alcohol-laden liquid pooling across the top. This dark liquid indicates that the wild yeast population has ceased multiplying and entered dormancy while the bacteria have acidified the medium past the point of comfortable yeast reproduction.
We look closely for signs of failure that cannot be remedied. Mold appears as dry, fuzzy patches in white, green, black, or orange, often clinging to dry crust on the rim of the jar. Pink or orange streaks through the wet paste indicate colonization by harmful bacteria such as Serratia marcescens. If we see mold or odd colors, we discard the culture entirely and sterilize the crock. If the starter is merely watery, acidic, and flat, it is safe to rebuild.
Choosing Unbleached Stoneground Rye Flour
When we nurse a sluggish culture back to vitality, the choice of grain matters deeply. Refined roller-milled white flour has had its bran and germ stripped away, leaving pure endosperm. While endosperm provides starch for food, it lacks the dense microflora and mineral content found on the exterior of the kernel. For this reason, we turn to whole unbleached stoneground rye flour for the recovery feeding.
Rye grain (Secale cereale) carries a heavy load of native yeasts and bacteria on its outer husk. It contains high levels of fermentable sugars, specifically fructans, which wild yeasts consume without waiting for amylase enzymes to break down complex starches. Furthermore, stoneground milling keeps the flour cool during processing, protecting naturally occurring enzymes that roller mills often damage with frictional heat. The physical texture of rye flour is coarse and absorbent, creating a dense paste that traps early gas bubbles clearly.
| Flour Type | Ash and Mineral Content | Fermentation Speed | Texture in Jar |
|---|---|---|---|
| Stoneground Whole Rye | High (1.6 to 1.9 percent) | Rapid and early | Dense, clay-like, holding fine gas pockets |
| Whole Wheat | Moderate to High (1.3 to 1.5 percent) | Moderate | Coarse, fibrous, expands readily |
| Unbleached Bread Flour | Low (0.5 to 0.6 percent) | Slow in weak cultures | Elastic, stringy, prone to liquefaction under acid |
We work with rye as an intensive restorative feed rather than a permanent substitution if our goal is to bake white hearth loaves. A blend of 40 grams of whole rye and 60 grams of unbleached bread flour gives the culture an immediate botanical boost while retaining the gluten characteristics we rely on for structure. After three or four cycles of active expansion, we can gradually shift the ratio back toward our preferred flour base.
Calculating Water Temperature for Ferment Health
Yeast activity slows to a crawl below 20 degrees Celsius (68 degrees Fahrenheit), while lactic acid bacteria continue to produce acid slowly even in the refrigerator. If we feed a weak starter with cool tap water on a chilly counter, we inadvertently encourage the bacteria to outpace the yeast. To reverse this imbalance, we target an internal dough temperature of 26 to 28 degrees Celsius (78 to 82 degrees Fahrenheit) right after mixing.
We determine our water temperature by accounting for three factors: the ambient room temperature, the temperature of our dry flour, and the heat created by mixing friction. Because we mix small amounts of starter by hand with a wooden spoon or spatula, friction is negligible and can be counted as zero. We use a straightforward equation to find the desired water temperature:
- Multiply your target ferment temperature (27 degrees Celsius) by 3 to get the base total: 81 degrees.
- Measure your ambient room temperature with a digital probe (for example, 20 degrees Celsius).
- Measure the flour temperature in your bin (for example, 19 degrees Celsius).
- Subtract room temperature and flour temperature from the base total: 81 minus 20 minus 19 leaves 42 degrees Celsius.
In this scenario, we heat our mixing water to 42 degrees Celsius before stirring it into the flour and starter seed. The resulting mixture lands right at 27 degrees Celsius. This warmth softens stiff starches, encourages dormant yeast cells to awake, and accelerates the enzymatic conversion of starches into maltose. We never use water above 40 degrees Celsius directly on the starter seed without mixing it with flour first, as prolonged contact with water hotter than 43 degrees Celsius can damage or kill wild yeast cells.
Discarding Deeply to Reset Acid Levels
The most frequent error in starter maintenance is retaining too much old culture during feedings. When we feed a starter using equal weights of starter, flour, and water (a 1:1:1 ratio), we carry forward roughly 33 percent of the old acid into the fresh paste. In a healthy starter, this is acceptable. In a sluggish, sour culture, this heavy acid load lowers the pH immediately, inhibiting yeast growth before the fresh flour has a chance to ferment.
To rescue a sluggish starter, we discard deeply. We retain only a small seed of the old culture, using a ratio of 1:5:5 or even 1:10:10 by weight. Diluting the acid allows the pH to rise back into a range where wild yeasts thrive, while providing an abundant supply of fresh sugars for the small population of cells to consume.
We prepare the reset feeding with clean tools and a fresh glass vessel. The steps are deliberate:
- Scrape and weigh the seed: Take 10 grams of the sluggish starter from the center of the jar, avoiding the dry surface crust or the liquid layer at the bottom. Discard the rest of the old culture into the compost.
- Disperse the seed in water: Place the 10 grams of starter into a clean jar. Add 50 grams of warm water (calculated to hit 27 degrees Celsius). Stir thoroughly with a wooden paddle or fork until the old starter breaks apart and creates a milky, froth-free liquid.
- Incorporate the grain: Add 50 grams of flour (20 grams of whole rye and 30 grams of unbleached bread flour). Stir until all dry patches vanish and a stiff, uniform paste forms.
- Clean the glass walls: Use a damp silicone scraper to push down any stray paste clinging to the sides of the jar. Wipe the interior glass clean above the surface of the starter so we can observe the rise without obstruction.
This feeding gives the yeast a tenfold supply of fuel relative to its population size. It dilutes the volatile acetic acids and gives the lactic acid bacteria a fresh start, allowing the microbial community to rebuild its balance from the ground up.
Establishing a Twelve Hour Feeding Cadence
Recovery requires predictability. Wild yeasts respond to consistent replenishment cycles, synchronizing their growth curve to the availability of nutrients. We place the jar in a warm spot, out of direct sunlight and drafts, ideally between 24 and 26 degrees Celsius. A closed cupboard near a stove or an unlit oven with the light bulb turned on provides an even climate.
We mark the height of the freshly mixed paste with a rubber band around the jar and leave the lid resting loosely on top to let fermentation gases escape. Over the next twelve hours, we observe the paste at regular intervals without disturbing the jar. We look for specific physical stages:
- Hour 2 to 4 (Lag Phase): The paste remains quiet. Bubbles are rare. Enzymes absorb water and break down starches into fermentable sugars.
- Hour 5 to 8 (Exponential Growth): Small bubbles appear along the glass. The rubber band marks our baseline, and the starter expands upward by roughly 30 to 60 percent. The surface rounds slightly, dome-shaped.
- Hour 9 to 12 (Peak and Plateau): The starter reaches double its initial volume. The surface flattens, showing scattered, popped bubbles. A faint smell of ripe apples and sweet alcohol replaces the sour vinegar odor.
We repeat this feed every twelve hours on the dot, discarding back to 10 grams of starter and feeding 50 grams of water and 50 grams of flour. By the third or fourth consecutive cycle, the starter will reliably double within six to eight hours of feeding. This consistency signals that the population density has recovered and the acid levels have stabilized.
Testing Buoyancy Before Mixing Dough
When the starter rises predictably on its twelve-hour schedule, we verify its readiness for dough mixing using physical tests. The eye and the hand provide the best feedback. We inspect the top surface of the culture: it should be convex, bulging gently against the glass, showing that gas pressure inside the matrix is actively pushing against the atmosphere.
The float test offers a tactile check of aerated density. While not infallible, it confirms whether the paste has retained enough carbon dioxide to lift its own weight in water:
- Fill a small bowl with room-temperature water.
- Gently spoon roughly a teaspoon of starter from the top of the jar. Take care not to crush the airy pockets or smear the paste against the side of the container.
- Lower the spoon into the water and let the dollop slip free.
If the starter floats buoyantly on the surface like a piece of foam, the yeast has produced sufficient carbon dioxide and the gluten matrix is strong enough to trap it. If the dollop sinks to the bottom, the culture either has not reached its peak aeration, or the gluten structure has already collapsed from over-acidification. If it sinks, we wait for the next feeding cycle, adjust the room temperature, and test again at the eight-hour mark.
Common Mistakes in Sourdough Recovery
In our work with sourdough cultures, we frequently encounter small errors that prevent a full recovery:
- Feeding too frequently: Refreshing a sluggish starter every six hours before it has had time to multiply merely dilutes the existing yeast cells into extinction. Always wait for the culture to show signs of life before feeding again.
- Using chlorinated municipal water: Chlorine and chloramines suppress microbial growth. If your tap water smells treated, boil and cool it, or run it through an activated carbon filter before using it in your ferment.
- Sealing the jar airtight: Tight rubber gaskets can cause excessive gas pressure to build, which alters the solubility of carbon dioxide in the wet mix and stresses the yeast. Rest the lid lightly on the rim.
- Chilling the starter too early: Placing the jar back into the refrigerator before it achieves two consecutive, strong, warm rises will send the yeast back into dormancy while leaving the acid problem unresolved.
Practical Next Steps for the Bake Day
Once your starter doubles within seven hours over two successive feeds, it is ready to leaven bread. For the bake itself, mix a dedicated levain rather than using the entire mother jar. Take 20 grams of your restored culture, combine it with 80 grams of water and 80 grams of your standard bread flour blend, and let it ripen for six hours until light and spongy. Reserve the remaining 10 grams of mother starter in the jar, feed it at your normal maintenance ratio, and let it rest on the counter until it begins to rise before returning it to cool storage.
If your culture fails to produce bubbles or rise after five days of strict twelve-hour feedings at warm temperatures, the wild yeast colony may have died completely from heat, contamination, or extreme acidity. At that juncture, we recommend compost disposal and starting anew with fresh whole grains, clean water, and a freshly cleaned jar.