We know the sharp, acrid smell of sugar or starch catching against the bottom of a heavy Dutch oven. It happens during a long braise when the liquid drops below the cut of meat, or when an apple butter simmer goes unmonitored for ten minutes too long on an uneven burner. The dark crust looks catastrophic, fused to the pale glossy basin as if it has melted directly into the vessel itself.
When panic sets in, the instinct is often to reach for coarse wire wool or harsh industrial cleaners. We resist that urge. Vitreous enamel is not raw cast iron, and it cannot be scrubbed back to bare metal and re-seasoned on a whim. It is a thin, smooth layer of glass fused over an iron core. Bringing it back to clean health requires an understanding of materials, thermal boundaries, and mild chemical reactions that dissolve burnt matter without scarring the smooth cooking surface.
Why Vitreous Enamel Requires Gentle Chemistry
Vitreous enamel is porcelain glass ground into a fine powder, suspended in water to form a slip, applied to cast iron, and fired in a furnace at temperatures between 1400 and 1550 degrees Fahrenheit. The result is a smooth, non-porous glass sheet chemically fused to the cast iron substrate beneath. Glass is hard, sitting between 5 and 6 on the Mohs hardness scale, but it is rigid. It possesses zero tensile flexibility.
Because enamel is essentially silica, high-alkaline compounds like raw caustic soda or prolonged exposure to concentrated mineral acids can etch the polished surface. Once the surface loses its factory glaze through chemical erosion, microscopic pores open up. Food then catches and burns far more easily in subsequent cooks. Abrasives like steel wire, copper scrubbers, or emery pads will leave micro-scratches that permanently cloud the finish and expose the darker primer coat beneath.
We rely instead on mild alkaline agents, specifically sodium bicarbonate, which has a Mohs hardness of roughly 2.5. This allows it to abrade baked-on organic grease without exerting enough hardness to scratch the silicate glass surface.
| Cleaning Agent | Hardness or pH Level | Effect on Vitreous Enamel |
|---|---|---|
| Sodium bicarbonate | Mohs 2.5 / pH 8.3 | Safe. Softens burnt fats without scratching the glass glaze. |
| Steel wool pads | Mohs 4.5 to 5.5 | Destructive. Scratches the fire-polished surface and causes permanent dullness. |
| Dilute white vinegar | pH 2.5 | Safe for short periods. Dissolves mineral deposits and calcium haze. |
| Lye-based oven cleaner | pH 13 to 14 | Risky. Prolonged contact can chemically etch and dull the gloss coat. |
Allowing Cast Iron to Cool to Room Temperature
The most dangerous moment for an enameled pan happens right after the burn occurs. When we see a blackened crust clinging to the base, our reflex is to walk the pan directly to the sink and run cold water over it. This impulse destroys more enameled cookware than scorching ever will.
Cast iron and porcelain glass expand and contract at different rates when exposed to heat changes. Iron expands rapidly and contracts with force, while the rigid silicate enamel bonded to its surface cannot match that speed of contraction. When cold tap water hits a 400-degree pot, the sudden thermal shock pulls the iron away from the glass in fractions of a second. The mechanical bond snaps, resulting in crazing, cracking, or large shards of enamel shearing entirely off the iron core.
We place the hot pot on a dry wooden cutting board or a cold trivet on the counter. We give it at least 35 to 45 minutes to cool until we can rest our bare hand comfortably against the outside wall. Only when the metal has settled back into its contracted, room-temperature state do we introduce water.
Boiling Water and Soda on the Burner
Once the pan is cool to the touch, we use hot water and heat to do the mechanical work for us. Carbonized sugars and denatured proteins form rigid polymer chains that grip the vitreous surface. Applying warm alkaline water softens these bonds through gentle saponification, turning baked fats into water-soluble residues.
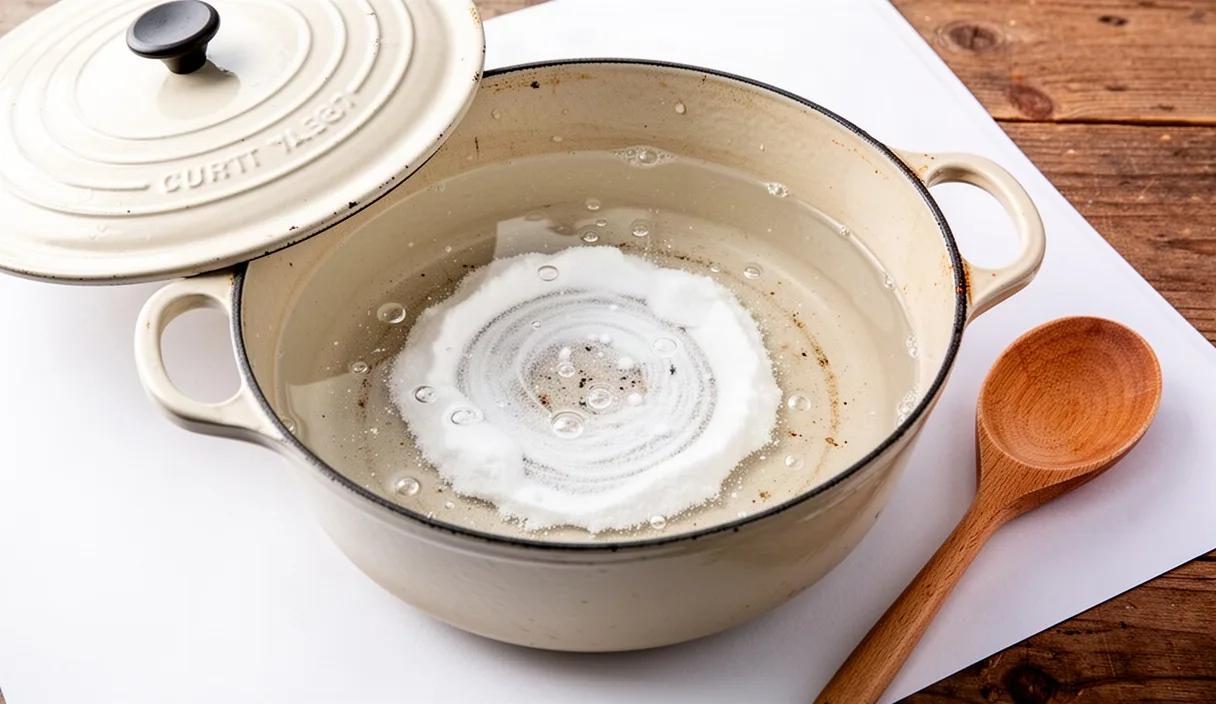
Pour enough lukewarm tap water into the pan to cover the burned area by at least 1 inch, which usually requires between 2 and 4 cups depending on the diameter of the base. Place the vessel on your stovetop over medium-low heat. As tiny bubbles form along the bottom, stir in 2 to 3 rounded tablespoons of sodium bicarbonate. The soda will foam mildly as it dissolves into the warm water.
Bring the mixture to a slow, controlled simmer. Do not boil it violently; high heat is unnecessary and can cause the alkaline water to splatter onto your stovetop. Maintain this gentle simmer for 15 to 20 minutes, topping off the water level with a splash from a kettle if the liquid evaporates too quickly.
Using Wooden Spoons to Dislodge Carbon Layers
While the simmering baking soda bath cooks, the hardened carbon will absorb moisture and loosen. We avoid metal spatulas or stainless steel spoons entirely, as metal tools easily strike the glaze and leave dark gray friction tracks or chipped patches.
We select a flat-edged spatula carved from hard maple, beech, or cherry. Hardwood has a Mohs rating under 2, making it incapable of scratching the glass surface, while its sharp edge provides mechanical leverage.
- Position the flat edge of the spoon against the bottom at a 45-degree angle.
- Apply firm, steady downward pressure while pushing forward into the edge of the carbon crust.
- Work in narrow rows, scraping loosened flakes into the cloudy liquid.
- For rounded corners where the base meets the sidewall, use a spoon with a curved profile to trace the perimeter.
You will feel the crust give way, changing from gritty resistance to smooth glass beneath your fingers. Turn off the burner, allow the pot to cool for 15 minutes, pour out the darkened murky liquid, and rinse the interior with warm water.
Polishing Residual Water Stains with White Vinegar
After the thick carbon layer has rinsed away, you will often notice a hazy white film, gray cloudiness, or a dull shadow where the burn occurred. This is not damaged enamel; it is usually a layer of mineral scale combined with stubborn protein residue that alkaline soda alone cannot dissolve.
For this stage, we turn to mild acid. Standard distilled white vinegar contains roughly 5 percent acetic acid, which breaks down calcium and magnesium carbonates without attacking the silica structure of the glaze.
Pour 1 cup of white vinegar into the empty pot. Add 2 cups of hot tap water to create a dilute warm wash. Allow this mixture to sit in the pot for 12 to 15 minutes without heating. Take a soft natural-cellulose sponge or a horsehair dish brush and wipe the entire interior in circular motions. The dilute acid neutralizes any remaining alkaline traces and lifts the chalky haze. Rinse thoroughly with clear water and dry the pan immediately with a clean cotton tea towel to prevent hard water spotting.
Inspecting the Coating for Thermal Hairline Fractures
Before returning the Dutch oven to your pantry shelf, take the time to evaluate the physical integrity of the glaze. A scorched pan has undergone significant thermal stress, and carbon can hide damage beneath its black surface.
Set the pot under a direct task lamp or bright window. Tilt the vessel so the light cuts across the enamel surface at an oblique angle. This raking light highlights surface variations that remain invisible under diffuse illumination.
Crazing
Crazing appears as a web of spider-web lines trapped on the surface of the glaze. If you drag the back of a clean fingernail over the lines and feel no catch, the glaze is sealed, though mechanically weakened. The pan remains usable, but it should be kept to low-temperature cooking.
Chipping
Chipping reveals pits where the colored topcoat or black primer coat has broken off, exposing dark raw cast iron. If an enamel pot is chipped on an interior cooking surface, microscopic shards of glass can loosen into food. We do not use chipped pots for cooking. A cookware specialist or manufacturer should be consulted for evaluation, or the piece retired from food preparation.
Permanent Staining
Yellow or light brown shadows that feel perfectly smooth to the touch are merely cosmetic oil stains baked into microscopic surface imperfections. They do not affect food safety or heat performance, and they will gradually lighten with normal use and careful washing.
Common Mistakes
- Using green synthetic scouring pads. Many heavy-duty scouring pads incorporate aluminum oxide particles, which are harder than enamel and will ruin the glossy finish.
- Applying oven cleaner indiscriminately. Heavy lye sprays dissolve baked grease, but leaving them on enameled iron for long periods can permanently fog or dull the colored exterior glaze.
- Thermal quenching. Running cold water into a warm pot to make it easier to scrape, which induces micro-cracking across the iron core.
- Dry heating to burn off residue. Trying to carbonize residues further by heating an empty enameled vessel on high heat, which invariably leads to crazing.
Practical Next Steps for Long-Term Care
Once your enamel is clean, smooth, and dried, simple storage habits prevent future damage. Place the pot on a sturdy shelf with the lid inverted, resting on rubber bumpers or four plastic rim clips. This keeps air moving through the interior, preventing trapped moisture from rusting the bare cast iron rim where the enamel was trimmed before firing.
Adjust your heat management on the stove. Cast iron stores thermal energy slowly and releases it with intense uniformity. When a recipe calls for medium heat, bring the vessel up to temperature on low for four minutes before adjusting upward. You will rarely need more than medium-low heat once the mass of iron is saturated, protecting both your food from scorching and the vitreous enamel from excessive stress.